Japanese Pattern Inlay Keychain Kit
Posted by LeatherCraftTools.com (Jan 23, 2018)

Keychain kit with Tatami edge inlay that adds full of Japanese taste.
-
1.
-

Prepare materials you need.
We made key holder using ready-made "Japanese pattern inlay keyholder kit" for this project..
-
2.
-

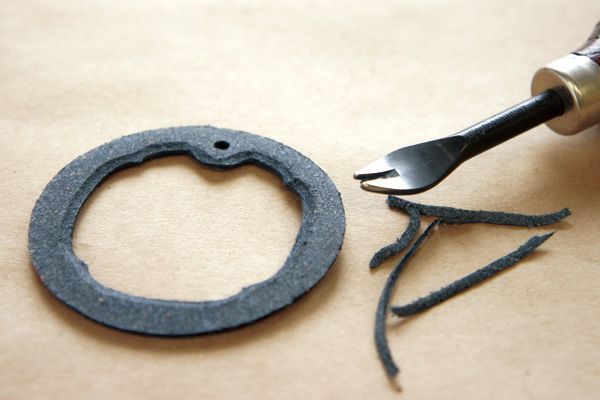
Shape the edge of the loop shaped leather parts with edge tool.
Apply leather coating,
We used PRO Edge Tool & Sharpening Tool(No.02)1.0mm.
-
3.
-
Scrape the edge split (the reverse of leather) of window to make it thinner so that inlay material will fit perfectly.
We used PRO Edge Tool & Sharpening Tool(No.06)1.8mm for
Round off the edge.. Apply leather coating on the edge.
-
4.
-

Scrape off edge of the core leather to make it in gentle mountain shape.
Inlay material fits perfectly by thoroughly rounding off.
Again, we used PRO Edge Tool & Sharpening Tool(No.06)1.8mm.
-
5.
-

Attach the core leather to sole leather with leather glue.
Adjust the position to exactly match with the window.
-
6.
-

Put the inlay material between the leather parts. Make sure not to apply glue on the center as the glue will penetrate through Tatami edge.
-
7.
-

Use clips to securely adhere the leather parts..
Make sure to clip along the line for stitching as much as possible to avoid the marks. Unclip early when it starts to dry.
-
8.
-

Shape the bonded edge with edge tool. Apply leather coating.
SP Coat will give beautiful glossy finish on the edge. SP Edge Kote is useful as you can mix like water colors and create your preferred color.
You can get more work done by using Foam Brush which is a tool with tapered sponge . Soak the sponge with coating and apply on the edge. You can control the amount of coating by adjusting the pressure.
Apply the coating carefully for not to spread out the coating on the grain side.
-
9.
-

Once the coating is dry, sew the bonded edge.
-
10.
-

Finish sewing and knot the tread.
This sample was sewn using VINYMO <MBT> Polyester Machine Thread (thickness: # 5, color: Black).
-
11.
-

Attach loop leather parts to ring and fasten with double cap rivets.
-
12.
-

Make sure the rivets are securely fastened. Pull into shape.
Sign in to post a comment!


Show more