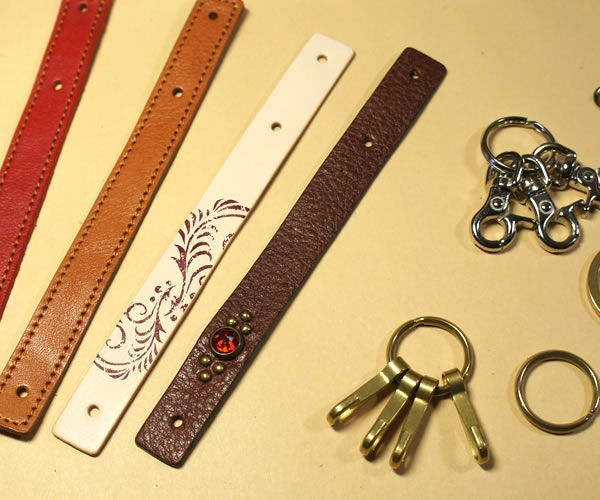
Key Ring <Loop Type A>
Posted by LeatherCraftTools.com (Dec 24, 2019)
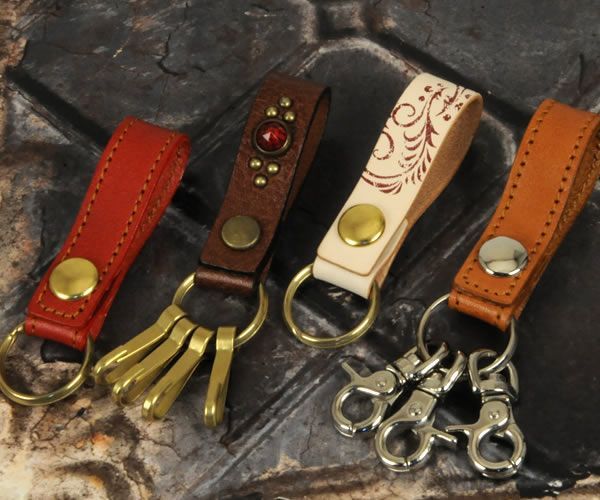
Here I make a key ring which is a loop you can open and close with fastener snaps.
As to this type of key ring, you can use it attaching it through the loop of a belt or pants like a key fob.
-
1.
-
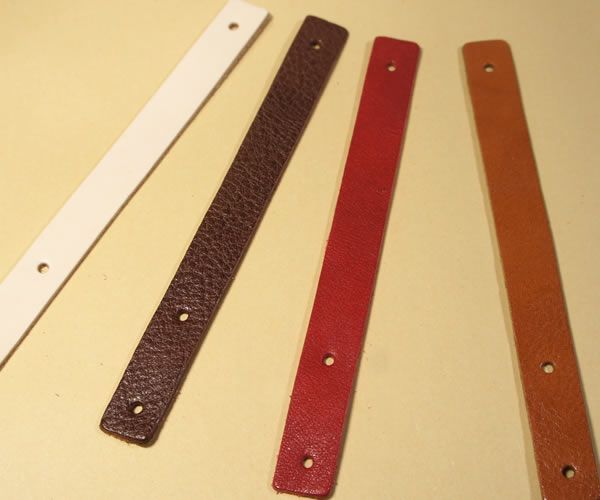
Cut out the leather material. This time, I used an off-the-shelf kit "Key Ring Kit <Loop Type A>".
-
2.
-
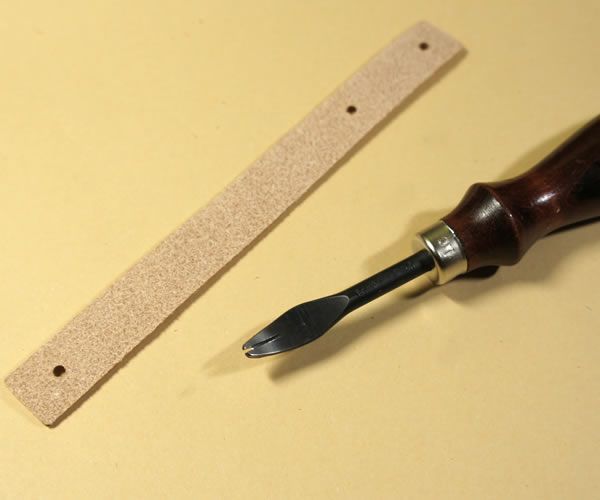
In case of firm and flexible tanned leather, treat the edge with an edge beveler. This time, I used a 0.6mm beveler because the leather was thin.
-
3.
-

Arrange the tanned leather by stamping. Using an ink pad for both leather and tanned leather would be convenient since you can stamp various patterns.
-
4.
-
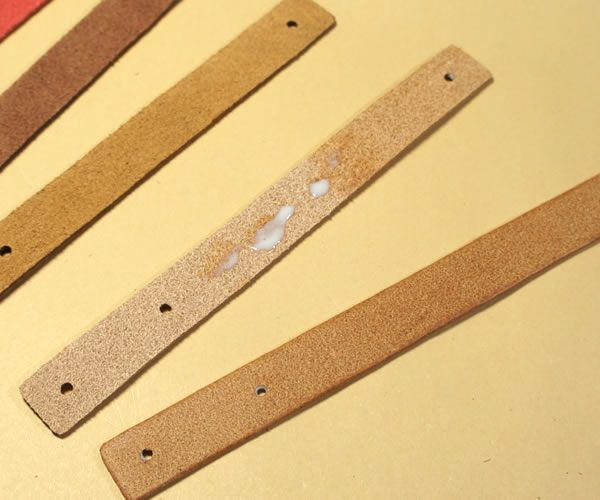
Finish the back and edge of the leather with gum tragacanth. It would be finished nicer if you could polish the back and corner of the edge smoothly.
If gum tragacanth was dropped on the grain side, it would become a stain. So keep a wet towel, etc at hand and wipe any excess off quickly.
-
5.
-
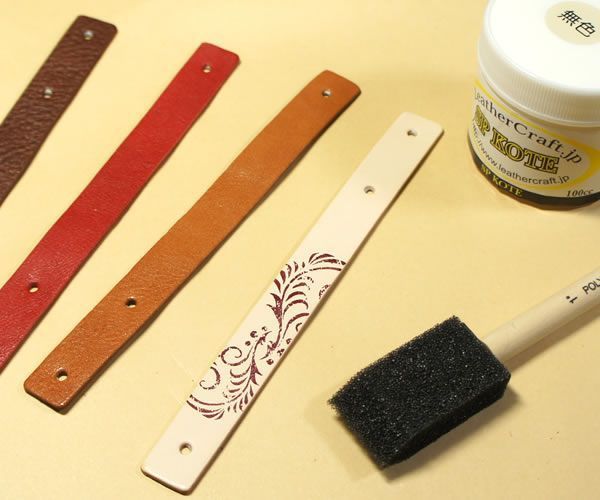
Give edges a coat of gum tragacanth.
When you apply gum tragacanth on the tool called foam applicator which has a form on its tip, you can control the coating amount by the degree of pressure and your work can progress. Be careful that the gum tragacanth does not protrude to the grain side.
-
6.
-
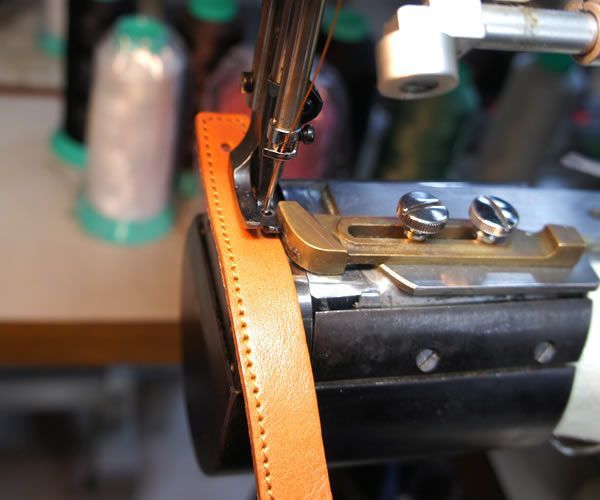
I did some decoration stitching. Just stitching can give it such a different atmosphere. Although this time I used a sewing machine, you could enjoy a casual texture by hand stitching.
-
7.
-
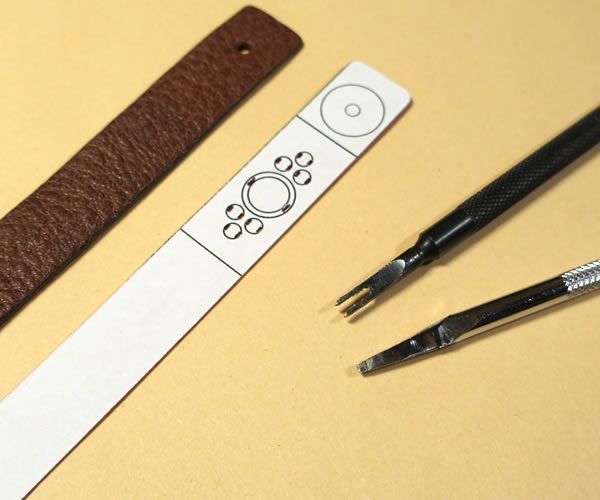
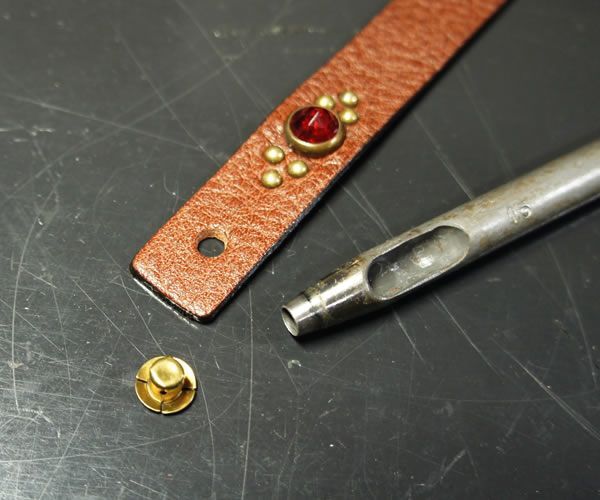
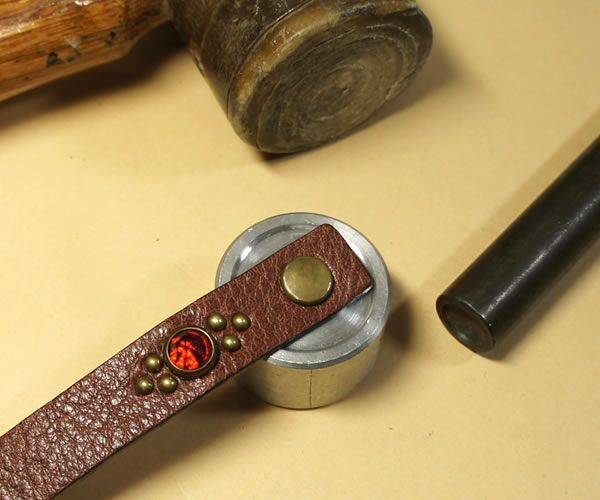
Let's attach spots. Think about the design and decide the points where the claws go through.
If you make patterns using stiffener, you can make holes at the exact places. Therefore, in order to attach spots nicely, you need to make patterns with precision.
-
8.
-
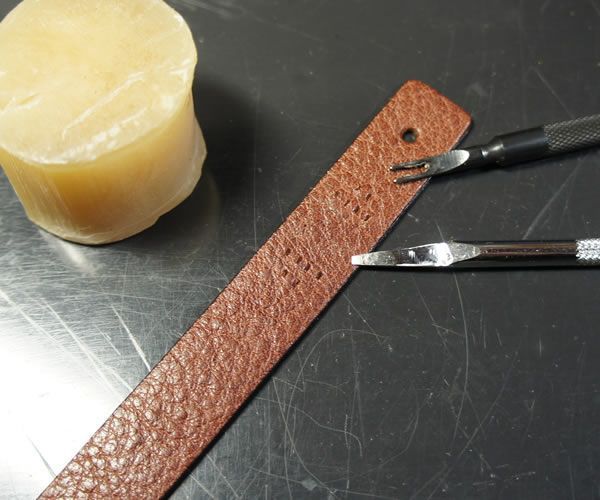
Using patterns, mark (trace) the points of holes, and make holes on the leather.
If you stick tools in the wax you use for sewing before tooling, you can do insertion and removal of your tool smoothly when making holes.
-
9.
-

Make claws go through the holes, and attach the spots on the leather.
-
10.
-
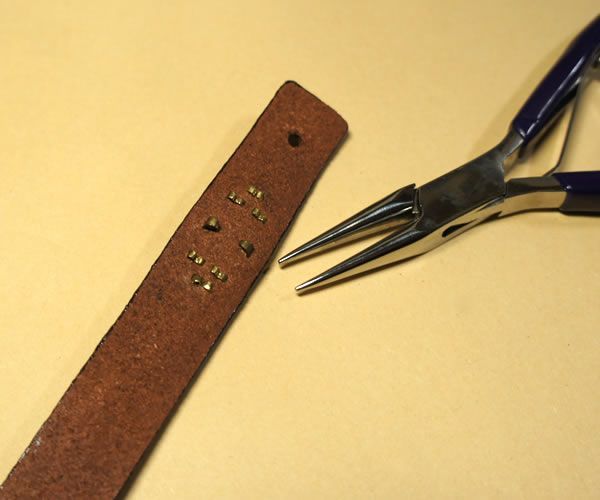
Bend the claws around the leather using a tool such as a plier.
-
11.
-
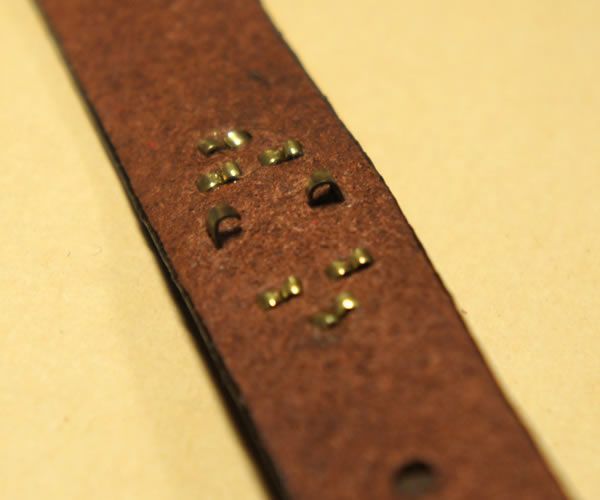
Don't fold the claws, rather, bend and stick them into the leather. That way they don't come off easily and don't get caught on your clothes or such.
-
12.
-
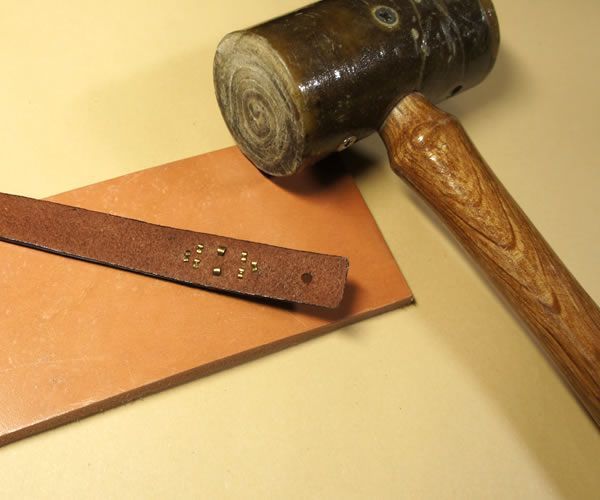
To attach the spots tightly on the leather, after bending the claws by pulling them with a plier as strongly as possible, press them down by hitting lightly with a hammer.
Be careful not to crush or scratch the head of the spots. Working on something like a piece of the thick leather would help.
-
13.
-
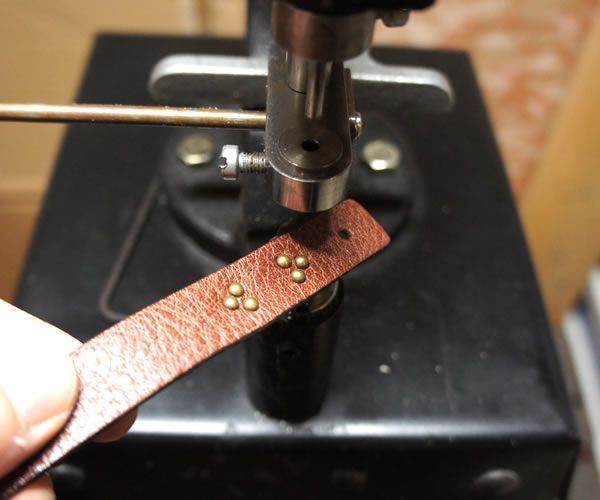
If you use a tool called spot setters, Steps 10~12 will be quicker and nicer. Especially when dealing with a lot of spots, that'll be very convenient.
-
14.
-
After you finish the preparation of arranging and finishing, you can go on to assembling.
-
15.
-
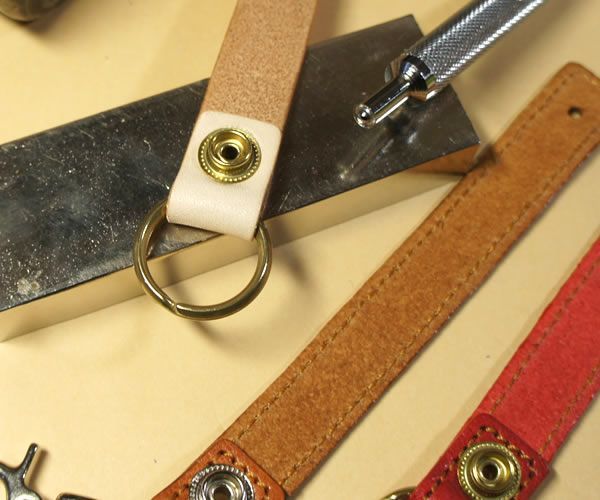
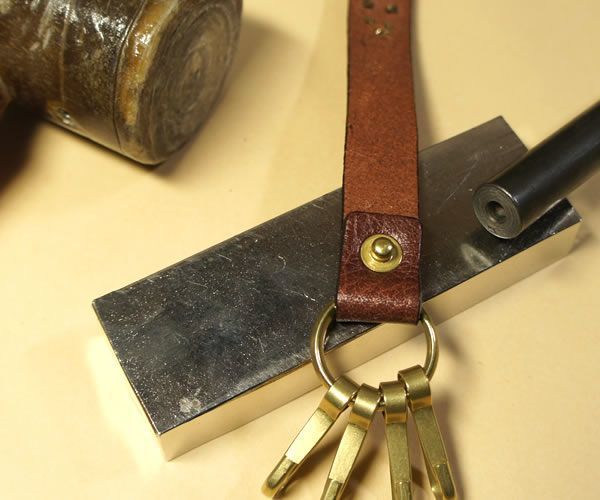
Put the leather through a split key ring and set the male part of the snap. Then attach the snap with a snap setter. Work on a snap attaching surface.
-
16.
-
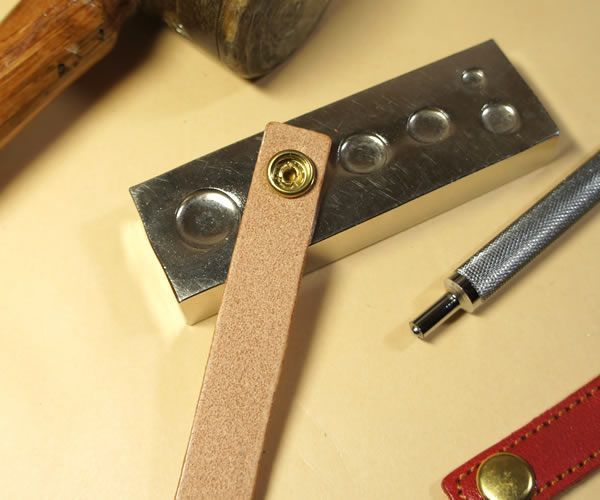
Set the female part of the snap, and attach it with a snap setter. Using an almighty attaching surface would be very helpful.
-
17.
-
For this type of key ring, I used a segma snap. Segma snaps don't have any space between leathers when they close and so they look neat.
Both parts are head, and so they look nice at the both sides.
The hole size for installment becomes bigger, and so I made the hole for the female part bigger using a 4.5mm round hole punch.
-
18.
-
Using a special setter for segma snaps, attach a male part.
-
19.
-
Same way, attach the female part with the special setter and the base.
-
20.
-

Make sure all the snaps are attached firmly, and if you fix the overall shape, it's done!
Sign in to post a comment!


Show more